Starter's Guide to Probiotic Yogurt: How to Achieve Perfect Fermentation Using a Yogurt Maker
Making probiotic yogurt at home can be an enjoyable endeavor for beginners. A yogurt maker facilitates the fermentation process, providing consistent results. Picking quality ingredients and understanding the fermentation temperature are crucial steps. This guide will examine essential tips and techniques to achieve the perfect yogurt texture and flavor. With the right approach, homemade yogurt can become a staple in any kitchen. The journey to mastering yogurt-making techniques begins here.
Understanding Probiotics and Their Advantages
Even though many individuals are aware of probiotics, their precise benefits often remain ambiguous. Probiotics are living microorganisms, chiefly bacteria, that provide health benefits when taken in appropriate amounts. They perform an crucial role in maintaining gut health by equilibrating the gut microbiota, which can impact digestion and nutrient absorption. Research shows that probiotics may assist in reduce symptoms of gastrointestinal problems, such as irritable bowel syndrome and diarrhea. Furthermore, they can improve immune function, possibly lowering the rate of infections.
Emerging studies suggest that probiotics may also have mental health perks, as the gut-brain axis demonstrates a connection between gut health and mood regulation. Furthermore, certain probiotic strains have been associated to better skin health and reduced inflammation. By incorporating foods abundant in probiotics, such as yogurt, individuals can support their overall well-being, making probiotics an important aspect of a balanced diet.
Selecting the Right Yogurt Maker
Choosing the appropriate yogurt maker is essential for proper fermentation. There are many types of yogurt makers on the market, each with unique features that meet different needs. Understanding these options can help individuals choose the best device for their yogurt-making journey.
Yogurt Maker Types
When beginning the journey of yogurt making, understanding the different types of yogurt makers is vital for achieving the perfect consistency and flavor. There are primarily two categories: electric yogurt makers and non-electric options. Electric yogurt makers often come with precise temperature controls and timers, making them convenient for beginners. They typically include multiple jars for batch production. In contrast, non-electric yogurt makers require somewhat more manual intervention, utilizing insulated containers or valuable resource even simple methods like using an oven or a cooler to maintain warmth. Additionally, some home chefs prefer using Instant Pots or slow cookers, which can serve dual purposes. Choosing the right type ultimately depends on personal preferences, available kitchen space, and desired yogurt-making experience.
Essential Features to Review
Choosing the right yogurt maker requires several key features that can significantly affect the yogurt-making experience. Initially, the capacity is crucial; users should consider how much yogurt they typically consume. Temperature control is another critical factor, as exact settings provide peak fermentation. Some models offer adjustable time settings, enabling customization based on the desired yogurt texture. Moreover, ease of use and cleaning should not be overlooked; simple controls and dishwasher-safe components enhance convenience. A yogurt maker with a built-in timer can help users track the fermentation process successfully. Finally, durability and warranty are important considerations, assuring the product lasts and provides peace of mind. Assessing these features can lead to a rewarding yogurt-making journey.
Essential Components for Homemade Yogurt
When creating homemade yogurt, choosing the right ingredients is critical for obtaining the desired consistency and flavor. This includes picking out appropriate milk types, picking a suitable starter culture, and considering any sweeteners or flavorings to enrich the final product. Each component plays a crucial role in the overall quality of the yogurt.
Milk Types and Options
Milk functions as the foundation for homemade yogurt, playing an essential role in determining the final texture and flavor. Various types of milk can be employed, including whole, skim, and low-fat options. Whole milk typically yields a creamier, richer yogurt, while skim milk results in a lighter consistency. For those seeking alternative options, plant-based milks, such as almond, soy, or coconut, can be used, though they may require additional thickeners to achieve the desired texture. It is crucial to consider the nutritional content and flavor profile of each milk type, as they can influence the fermentation process. In the end, the choice of milk should align with personal preferences and dietary needs, ensuring a satisfying homemade yogurt experience.
Starter Culture Selection
Creating successful homemade yogurt depends largely on the selection of an appropriate starter culture, which introduces beneficial bacteria essential for fermentation. Generally, commercial yogurt containing live active cultures serves as an excellent choice for beginners. Search for strains such as Lactobacillus bulgaricus and Streptococcus thermophilus, which are vital for thickening and flavor development. Moreover, some may prefer specific probiotic blends, offering diverse health benefits. When selecting a starter culture, it's crucial to verify freshness, as older cultures may have reduced viability. For those seeking more control over the fermentation process, purchasing freeze-dried starter cultures can be helpful. In the end, the chosen culture will influence the yogurt's texture, taste, and probiotic content, making its selection a significant step in the yogurt-making journey.
Sweetening and Flavoring Ingredients
Though the fermentation process is necessary for yogurt's production, sweeteners and flavorings play an equally vital role in elevating its taste and appeal. Homemade yogurt can be tailored with different sweeteners such as honey, maple syrup, agave nectar, or sugar, enabling individuals to control sweetness levels. Natural flavorings, including vanilla extract, cocoa powder, or fruit purees, can boost the yogurt's taste profile. Fresh fruits, nuts, and seeds can also be included for texture and additional nutrients. When deciding on sweeteners and flavorings, it is essential to consider the balance between health benefits and taste preferences. By trying out with different combinations, yogurt enthusiasts can create a personalized product that suits their palate and dietary needs, making homemade yogurt a satisfying experience.
Detailed Instructions for Making Yogurt
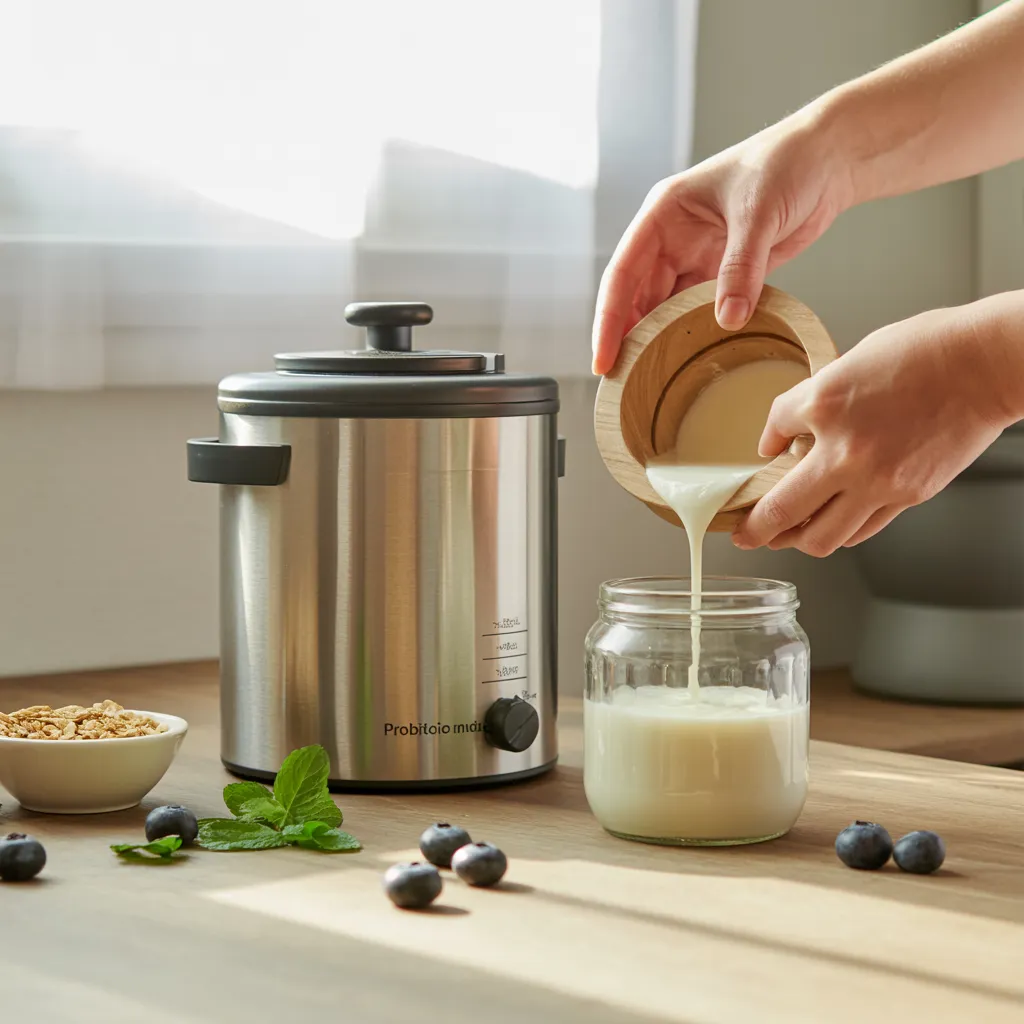
Preparing yogurt at home can be a rewarding experience that provides customization and control over ingredients. The process begins by gathering the necessary supplies: milk, a yogurt starter containing live cultures, and a yogurt maker. First, the milk should be heated to around 180°F to destroy any unwanted bacteria, then cooled to around 110°F. Once cooled, a small amount of yogurt starter is mixed into the milk, ensuring it is well-distributed. This mixture is then poured into the yogurt maker and set to ferment for a recommended period, typically between 6 to 12 hours, depending on desired thickness and tartness. After fermentation, the yogurt is refrigerated to stop the process. Finally, it can be consumed plain, or flavored with fruits, sweeteners, or spices, meeting personal preferences. With practice, this homemade yogurt can become a excellent staple in any diet.
Guidelines for Accomplishing Perfect Fermentation
Attaining perfect fermentation is crucial for creating smooth, flavorful yogurt, and numerous key factors can greatly influence the outcome. First, maintaining an ideal temperature is vital; most yogurts require a steady environment between 110°F to 115°F. This temperature encourages the growth of beneficial bacteria while suppressing harmful pathogens. Second, selecting top-quality starter cultures ensures that the desired probiotics thrive during fermentation. Fresh, live cultures will yield better results compared to older or inactive ones.
Moreover, the length of fermentation holds great importance; longer fermentation durations can intensify the tanginess and thickness, while shorter periods yield a milder flavor. It is also important to use fresh milk, as the quality directly impacts the yogurt's texture and taste. Lastly, avoiding disturbances during the fermentation process helps preserving a steady environment, allowing the bacteria to work optimally without interruption. Applying these tips can create a successful yogurt-making experience.
Adding Flavor to and Personalizing Your Yogurt
Personalizing and adding flavor to yogurt offers a personalized touch that can boost the appeal and taste of homemade creations. Following the fermentation process, numerous ingredients can be added to elevate flavor profiles. Fruit, such as berries, bananas, or peaches, offer natural sweetness and vibrant colors. For those looking for a richer flavor, natural honey or maple syrup can be incorporated, while vanilla extract provides a classic touch.
Spices like cinnamon or nutmeg introduce warmth and complexity, making yogurt suitable for different occasions. For a zesty variation, lemon zest or a dash of citrus juice can enhance the flavor profile. Additionally, nut butters or granola can be mixed in for texture, creating a delightful contrast.
Trying out with these ingredients stimulates creativity, allowing individuals to personalize their yogurt to personal preferences. Ultimately, customizing and flavoring yogurt converts a simple dish into an enjoyable and tasty experience.
Preserving and Using Your House-Made Yogurt
Once the yogurt has been made successfully, appropriate storage is important to maintain its freshness and probiotic properties. Homemade yogurt should be placed in clean, airtight containers to prevent contamination and spoilage. Glass jars or plastic containers with tight-fitting lids are ideal for this purpose.
It's recommended to refrigerate the yogurt immediately after making it to reduce bacterial activity and preserve flavor and texture. With proper storage, homemade yogurt can last for up to two weeks.
When it comes to usage, yogurt can be consumed plain or used as a base for desserts, smoothies, or salad dressings. Including granola, honey, or fruits can increase its taste and nutritional value. Furthermore, yogurt can be frozen for extended storage, though this may modify its texture upon thawing. By following these storage and usage guidelines, one can completely enjoy the advantages of homemade probiotic yogurt.
Questions & Answers
Is It Feasible to Create Yogurt with Non-Dairy Milk?
Non-dairy milk can indeed be used for making yogurt. That said, you may need particular cultures and adaptations to obtain the ideal consistency and flavor, as the fermentation process differs from traditional dairy yogurt.
What Is the Storage Duration for Yogurt in the Refrigerator?
Yogurt commonly stays good for from one to three weeks under refrigeration if stored correctly. Spoilage indicators include unpleasant odors, textural modifications, or mold growth; as a result, frequent inspections are recommended for upholding quality and safety.
Can Yogurt Starter Be Reused After Fermentation?
Yes, yogurt starter can be reused after fermentation. However, its effectiveness may diminish over time. For optimal outcomes, it's recommended to restrict the number of reuses and occasionally replenish with new starter cultures.
What Happens When Fermentation Temperature Drops Too Low?
When fermentation temperature is lower than optimal, the yogurt cultures can become inactive, causing insufficient fermentation. This may result in a more watery texture, insufficient tanginess, and diminished probiotic benefits, ultimately compromising the yogurt's quality.
Is Eating Expired Yogurt Safe?
Expired yogurt could still be safe to consume if it shows no indicators of spoilage, such as off smells or mold. However, its freshness and probiotic benefits may decline substantially after the expiration date.